Making a new Enemy - Part 1
I am currently in the process of creating a new enemy in the game, and I thought this would be a good opportunity to show you how I do it. Its gonna be a short multi part series where I document each step on the way.
- The first being concept and animation (that's two steps really)
- The next step will be adding it into the game, which usually consist of rigging it up and writing custom scripts.
- Usually what happens next is that the enemy ends up feeling incomplete and we go back to creating more animations to fit new behaviour.
- As a final step, further down the line, the animation will be cleaned up and the visual design of the enemy will be under revision.
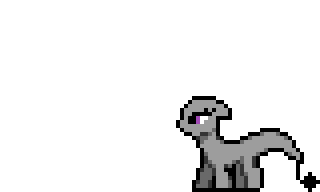
As I said, started with the concept Spent about half a day just sketching different creatures, enemies and similar. And then picked one that I thought would be interesting and add something new to the game. Meet the Lizzer!
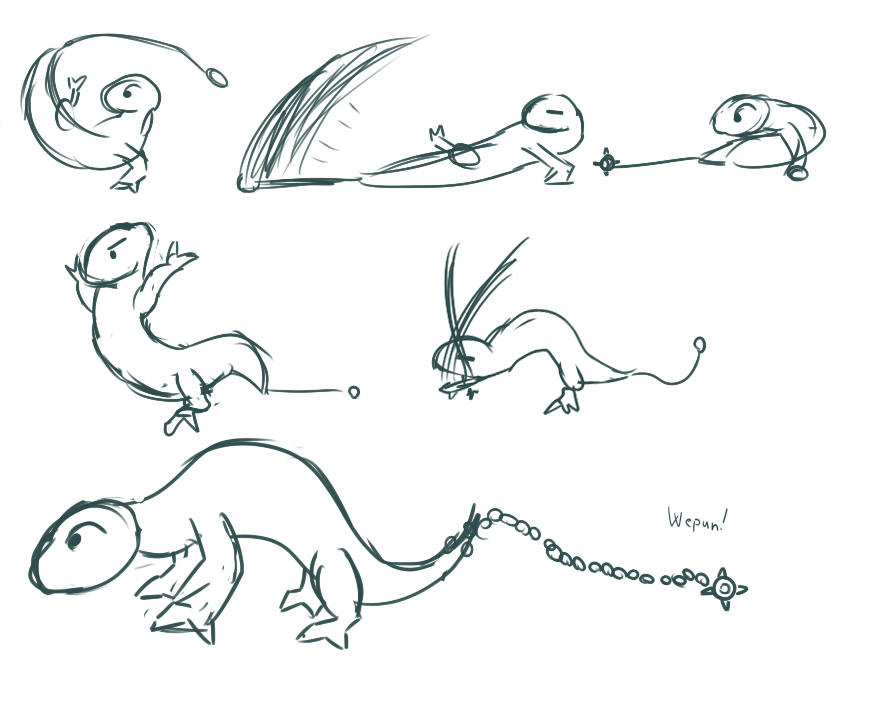
Done using paint tool SAI and a cheap ass wacom
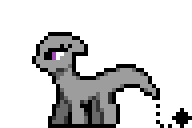
As you can see the concept for some offensive moves already exists. After running it through the team we decided to make it distinctly more pony. This was never sketched, as the concept was already there and nail down, it was time to start working on the production. As such I started the work on the base. I always start by just doing a simple left facing idle pose, its then used as a reference when I start animating, and as just a design baseline. Its also usually the most defining pose of a character so it has to be just right.
Usually I use the already existing pony base, but I wanted the lizzer to be larger than a regular pony, as such I ended up making this.
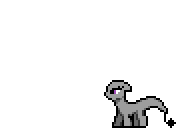
the down frames are about 50% longer than the frame where she is in between the extremes to create a satisfying bobbing motion.
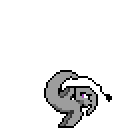
Next step is animating an attack, specifically I'm going into the swirling overhead attack with the tail flail up there. I liked how it looks so I'm putting it in the game. I start off by creating the keyframes. A good attack animation is done in 4 steps.
- You got the anticipation frames that telegraps that the attack is about to happen, and builds up energy to the attack.
- The active frames, which is WHEN the attack happens, it needs to clearly telegraph the hitbox that the player has to expect as well.
- Follow through where they recover balance and poise from the attack.
- And return to neutral.
The first two are the most important. The anticipation frame needs to be super clear and snappy. And should clearly telegraph what the enemy is about to do. The active frame needs to look cool. Because if they hit the game will pause for a split second (called hitstop), so it needs to look good on its own, as well as being a part of a smooth animation.
So the natural way to start this is to simply make an animation with only these frames.


Pretty simple. Looks okay. But there is an easy to way make it look and feel better, and that is to just adjust the duration it holds each pose.
Exact same frames. But by adjusting the frame durations the animation look a lot better. Something I learned and starting using very recently and I think it's a critical step in making the animation look and feel good. This is also all you need before using an animation. You should stop here and move on the game design... But since this is an animation breakdown, I'm going to continue. For the next step, we break down all the held frames and put some subtle motion in them. The anticipation frame here has a duration of 3 frames. So we break it into 3 separate frames, and add some small motion to it.
Its not a lot, but it helps keeping it moving and showing the direction. The important point here is that we are not creating tweens really. We are just adding more frames to a key-pose with some subtle motion in it. But a few tweens are created and added as well. These are one frame affairs that exist just to even out the motion between key frames. They also go past fast and you really don't need to spend a lot of time polishing them, they are just there to help your brain read the animation clearly.


Tween frames from neutral to holding the pose, and one from the recovery back to neutral.
Add these changes in and we get the final animation.
I use Pyxel for animations btw. Its a $5 program, its not the best animation program, but it is fantastic for drawing tile-sets.
This is still a ROUGH, keep that in mind. We are only focusing on the actual animation here, not creating the final artwork. Polishing up each frame is a time consuming process. We dont need it to sell the look and feel of an animation, and heck, some frames might not even make the final cut.
This concludes part 1. The next step will be to implement the enemy into the game, rigging up its animation in Unity and Setup the basic enemy AI.
- - - - - -
Actually I should quickly mentioned that for every step I showed you here I talked with and got feedback from all kinds of different People. Shout out to ZippySqrl who even helped me polishing up some frames by redrawing. Don't create things in a vacuum if you can help it.
- - - - - -
For some good information in game animations, I recommend checking the skull-girls animation talk. Which breaks down the design and thought process of making game animations effectively and with high quality. https://www.youtube.com/watch?v=Mw0h9WmBlsw
For a good break down on video game animation techniques, I think Video Game Animation Study got one of the best primer and refresher on the subject. https://www.youtube.com/watch?v=WYCjmVhiLaM
Leave a comment
Log in with itch.io to leave a comment.